Use Results Views to Focus Your Results
Your form results include many parts that are included by the Formsite system, such as the result status, time stamp, and referrer, and there may be a time when you don’t want to see everything. Or there may be a need to see only one or two values from a larger form. Results Views let you view or use specific results columns.
As part of the built-in results enhancement tools, Results Views let you focus your results’ displays wherever they occur. Along with Filters and Labels, Views lets you create custom email notifications, reports, integrations, exports, and any other function that uses your result data.

Built-in Results Views
There are occasions when you may want to provide a report or notification to someone and not include the statistical information with your result. Using the Views area in your function settings, selecting the All Items instead of the default All Items + Statistics will provide the view you’re looking for.
Live Demos:
Custom Results Views
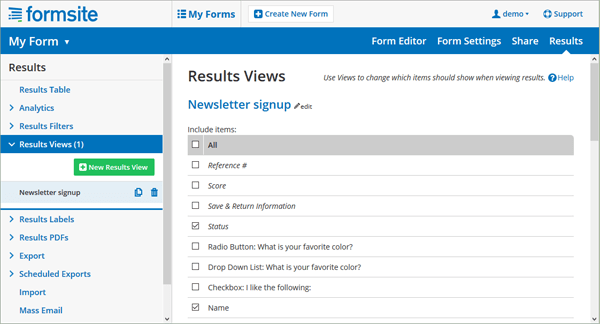
Custom Views are able to be made on the “Results->Results Views” page and shows each of your form items along with the additional informative items placed there by the Formsite system.
Example: Quickly see my preferred columns in the Results Table
Here I have a form with a large number of items and I want to set it up to quickly see my most important items.
- The first step is to go to “Results->Results Views” and make my new view. I give it a name, then select the items I want, then click Save.
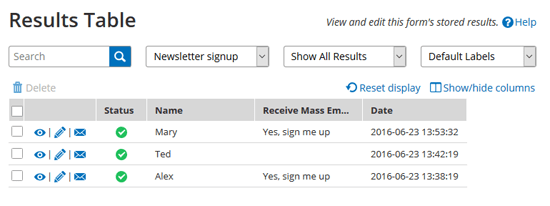
- Next, I go to my Results Table and use the dropdown whenever I want to change my Results View. In the example above I have set the ‘Newsletter signup’ view.

Example: Email Notification with order status
This form lets my visitors order products from me and I’ve added an Admin item to track the shipment status within the Results Table. I now want to set up a Notification email to send to the form visitor whenever the status changes.
- First, I go to “Results->Results Views” to make a new view. I set the view’s name, then the information I want to send: Reference #, Order status, Date.
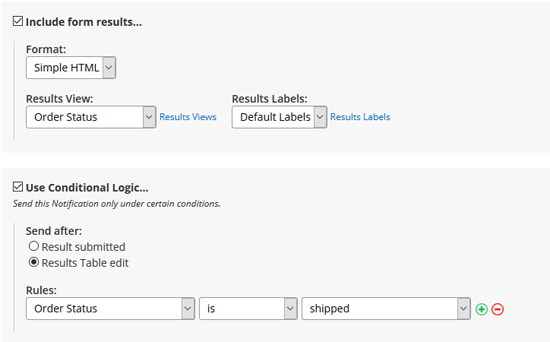
- Next, I go to the “Form Settings->Notifications” page and create a new notification that sends to the Email Address item from the result. I also set the Conditional Logic to send after the Results Table is edited.
- Then I select the new Results View I created and test the process to make sure everything works correctly.

Example: Client Reports
I have a form that collects information from all over the world and each country has a separate organization that receives the leads. Some of the form items appear based on the country selected and I want to give each organization a link to see just the items for them.
- I start at the Results Views page and make my new view. I set the name, then select the items for them.
- Next, I go to the Reports page and make each company’s report using the appropriate view for each.
- I copy the link and paste into an email, now that unique link is used to see the results specifically for each organization.
Get the full story and see the tutorial video on its documentation page, and contact us with any questions.

