Save & Return Features, Settings, and Tips
One of our most useful features is Save & Return, which gives your form visitors the ability to save their progress on your form. Using this feature is mostly straightforward but there are some settings and features that form owners should be aware of.
For example:
- Do I need to add the Save & Return item to my form?
- What do the settings do?
- How do I link to my form?
- How do Notifications work with it?
- Can I Pre-populate?
- Does it work with embedded forms?

The Save & Return Item
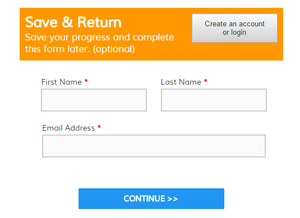
 Activating the Save & Return feature is done by logging in to your Formsite account and going to Form Settings -> Save & Return, then switching the Enable setting to Yes. Adding a Save & Return item to your form will automatically make the switch, too.
You should only use the item if you want to make saving optional. If you want to require that visitors log in then you can set the function to Always require login on the settings page, then there is no need for the item on your form.
Also, an important note is that visitors who create a new account will always begin with an empty form, so be sure to place the Save & Return item before any form question items to avoid the danger of visitors losing their answers.
The Settings Page

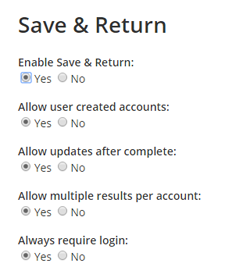
Allow user created accounts: You can limit access to your form by setting this to No and manually creating the accounts at the bottom of the page.
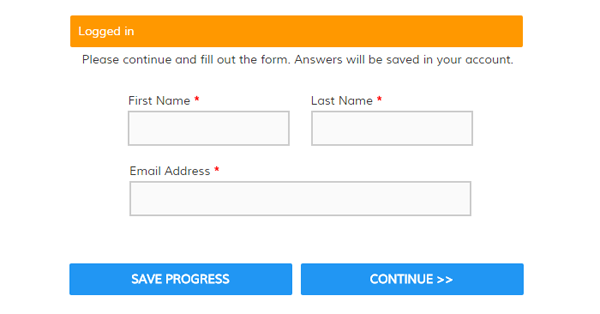
Allow updates after complete: There is a Save Progress button and a Submit button on your form. Clicking Save Progress will allow the visitor to return and clicking Submit will change the status in the Results Table to Complete. If this setting is set to No, the visitor is unable to modify their Complete result.
Allow multiple results per account: If you want to limit the visitor to a single result, set this setting to No.
Always require login: Choose whether to always direct visitors to the login page.
Header/Footer: These text areas allow you to add content (images, text, HTML) above and/or below the login form on the login page.This is a good place to add branding or instructions.
Accounts: Here you can view and edit the accounts for your form. Note that the accounts are specific for this form and do not apply to other forms in your Formsite account. If you want to enable access to the other forms in your account, you need to manually create the new accounts in the other form.
Linking To Your Form
If you set the Always require login setting to Yes then you can use either the form link or the form login link. If logging in is optional, you will need to control your links to make sure your visitors do the right thing.
Your form link looks like
https://fsx.formsite.com/user/form/index.html
Your Save & Return form link looks like
https://fsx.formsite.com/user/form/form_login.html
If your visitor uses the regular form link to access your form and you have the Always require login set to No, they will be able to complete your form and submit it as normal. If they use the form login link, they will see the login page and will need to create an account or log in before proceeding.
Notifications
Email Notifications are triggered when your form is submitted. If your visitor logs in to your form and updates the result, the Notification will be sent again if the submit button is clicked. The Notification will not be sent if the Save button is clicked, however, so if you need to receive notification of updates then we recommend that you provide instructions to your visitors to resubmit the form upon updating.
Pre-populating
Unfortunately Pre-populating doesn’t work with Save & Return. You can use the Pre-populate Link to send the visitor directly to the form, then manually set the visitor’s result in your Results Table to the correct username. That will give the visitor the ability to return to the form and edit their result.
Embedding
Yes, you can use Save & Return with your Embedded forms. The login form will appear in your embed area and registering or logging in will lead to the form as normal.