Instant Demo of FormSite

We have added the ability to jump right into an instant demo of Formsite.com with just the push of a button.

instant demo

Click this to preview a Formsite account and try out our celebrated form builder and other great features. This lets you use a temporary account to see everything Formsite has to offer. When you’re ready, you can simply sign up from inside of this account to keep it as your own, along with any forms or results contained within.
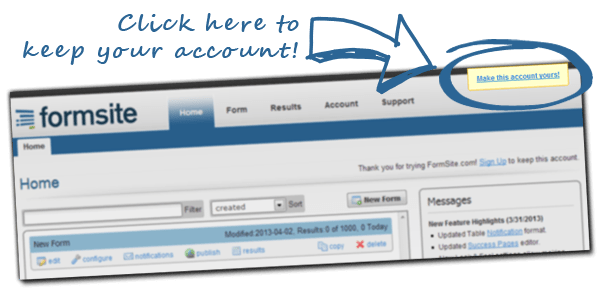
sign up to keep your instant demo account

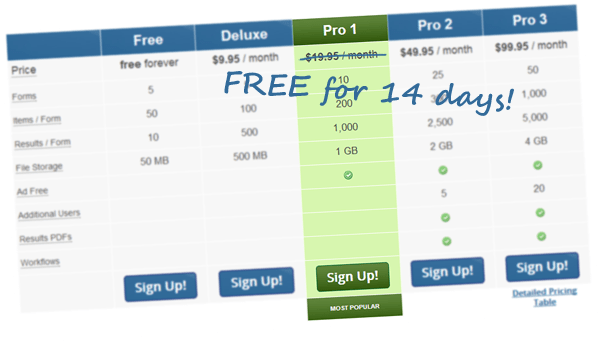
You can also sign up for a regular account, including a free 14-day trial of the Pro 1 level of service, HERE.

Continue reading

How to Make Image Buttons

Formsite has some advanced options that you can use to display an image as your form’s submit button.

First, you will need an image to use. Upload an image on your account’s “Account -> Files & Images” page. Then, copy the URL to where the image has been stored in your account. Keep this URL for later.

Big button.

Next, edit your form and go to the Look & Feel page. On the Look & Feel page, go to the Advanced tab. The Advanced tab allows you to directly edit your form’s CSS. Find the section for “.submit_button”, this CSS class controls your form’s submit button. Replace this entire section with the following:

.outside_container .submit_button {
background: url(/example/images/big-button.png);
border: none;
padding: 0;
height: 150px;
width: 150px;
}

Set the background to be the URL to your image. Set the height and width to match your image’s size. Then, save the Look & Feel page.

Lastly, go to your form’s “Form -> Custom Text -> Custom Text” page. Find the “Submit” label for the submit button and replace it with a single space. This will remove the label text from the button so that it will not obscure the image.

custom-submit

Continue reading

New Pro Trial Account Option

We have added a new option when signing up for a new account: Pro Trial. This is a complimentary 14-day trial of Pro 1, our most popular level of service.

Complimentary 14-day Pro Trial

This new option will let you try out Professional-level features, including:

There are no commitments and no obligation to renew. The trial lasts for 14 days. You are free to upgrade to a paid level of service at any time, letting you keep access to all of the features and limits of the Pro level. If the trial completes and you choose not to upgrade or renew, your account will simply revert back to the Free level of service, leaving your forms and results intact.

If you have not tried Formsite yet, Sign Up for a new account today and take advantage of the new Pro Trial option!

Continue reading

Reports Feature has Arrived

Formsite has a new Reports feature. It allows you to share your form’s results with your users. This can be very useful. Reports can be viewed in two formats: Table format and Chart format.

Table Report Format

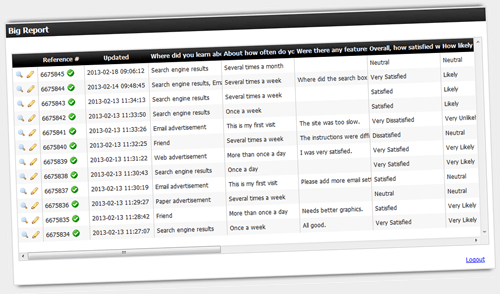
Table format shows your form’s results as a table. There is one row per result. The user can sort the table and resize the columns. You can optionally allow users to edit results from the table. All form data is available in the table. This includes: Order Form totals, Scoring totals, Form Login information, etc.

report-table

Chart Report Format

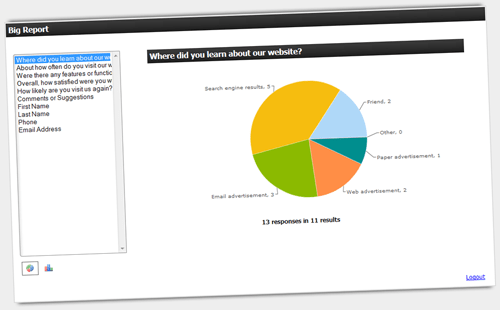
Chart format shows your form’s results as charts. There is one chart per form item. Users can select which item to view. The chart can be toggled to a pie chart or bar chart.

report-charts

Security

In cases where security is required, you can also add a password or restrict what data is included by using Views and Filters. You can create multiple reports with different settings and give them to different sets of users.

For more information, check out our graphs and tables for website forms.

Continue reading

Mobile-Friendly Presentation

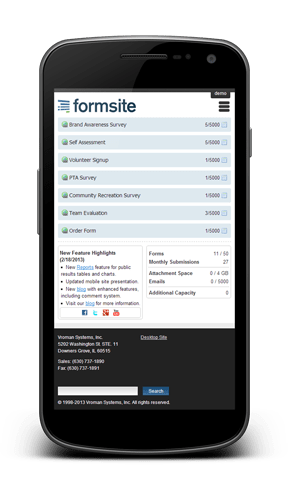
We have added a new mobile-friendly presentation option. You will see this by default after logging in on a smartphone or other mobile device.
mobile view
The mobile-friendly presentation gives a more concise view of your forms on the Home page. The Publish page has also been updated to make it easier to get links to your forms as well as share them on Facebook and Twitter. Updates on the Summary Table allow you to easily and quickly view your results on a small-screened device.

In addition to offering a more streamlined experience, the new mobile presentation also helps pages load faster and conserve mobile data usage. If you would like, you can also still get back to the regular “desktop” view at any time.

Sign Up or Login to try it out!

Continue reading

New Workflow Feature

Have you ever wanted to relate two or more forms together? With our new Workflow feature, you can!

In addition to simply tying two or more forms together, Workflows also allow you to implement very complex and powerful logic. With an optional Form Mapping, you can easily carry users' responses through multiple forms as well.

Continue reading

Authorize.net Integration with Recurring Billing (Subscriptions)

We have enhanced our Authorize.net forms and Payment Integration to support Automated Recurring Billing™ (ARB), which is a convenient and easy-to-use tool for submitting and managing recurring, or subscription-based, transactions. To use this, navigate to the "Form->Payments" page, click on the "Authorize.net" tab, set the Payment Location setting to "On form" and check the"Enable Recurring Billing (subscriptions)" box. Then, specify the Recurring Subscription Schedule with the Time Between Billings (billing interval) and Number of Payments settings.

Continue reading

New Rounded Corners

We have a new Look & Feel option to set rounded corners for form fields. With the arrival of Internet Explorer 10 and the decrease in older versions of Internet Explorer, we can now begin to offer more advanced Look & Feel options.

Rounded Corners

Rounded corners will work in any modern browser. Internet Explorer 8 and below cannot support rounded corners.

Continue reading

Enhanced Google Spreadsheets Integration

Our Google Spreadsheets Integration has been updated to provide extra convenience and security, courtesy of Google's newest OAuth 2.0 authentication. To take advantage of this, simply visit the "Form->Integrations->Google Spreadsheets" page, click "Get Token", and follow the prompts.

Continue reading
Billions of forms submitted