Image Instructions: A Reference Guide for All Service Levels
Whether it’s a logo, product image, or simply an interesting background, adding images to forms and other places helps to communicate with form visitors.
Formsite form owners at every service level can add images to forms, success pages, notifications, and virtually every other possible location. Past articles contain instructions for adding images, using the built-in and external hosting, and adding mobile-friendly styles.

This article combines the basics from those previous articles into a one-stop reference guide for using images with your Formsite account.
Upload the image
In order to use the image online, the file needs to be somewhere that a web browser can find it. That place is referred to as the source and can be located in any number of places:
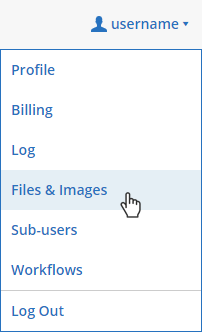
 Formsite account: The User menu -> Files & Images page is available to paid service accounts. There is no practical limit to the number of files you can upload on the Files & Images page. These files do not count toward the File Space limit.
Another online service: There are many free online image hosting services found by searching for ‘free image hosting’. These services allow for uploading images and provide the link to each file.
Anywhere else online: Images from other web pages can be used as long as the URL can be found. An example is when a form is being made for an organization that has a public web site and the logo is to be used on the form, too.
Important: Copyright rules apply. Do not use images that belong to others. Logos of other organizations and images from other sites may require permission to use.
Getting an image’s URL:
- Right-click the image in the browser
- Choose “Open image in new tab” (or similar, depending on the browser)
- Click into the address bar, highlight the URL, then click ctrl+c to copy
Using images
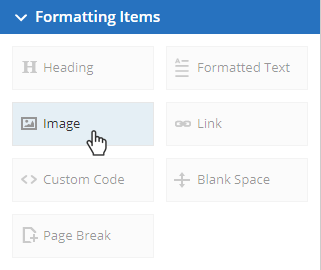
 Image item: The form editor contains an Image item that can be placed in the body of the form. The URL field is where the file is located.
- If the file has been uploaded to the User menu -> Files & Images page, click the “Choose image” link to choose the correct file.
- If the file is at a different address, paste that address into the URL field.
 Text editor: Including images using the text editor is necessary with Formatted Text items in the form editor, and adding images to Notifications, Success Pages, the Header/Footer, and others.
- Click the image button in the text editor
- Paste the URL where the file is located
Sizing images
The image height and width settings must not be defined as specific dimensions for mobile-friendly viewing. All devices have different display sizes so displaying images must enable custom viewing.
Image item: Set the height and width settings to be blank. If the image is shown too large, replace it with a Formatted Text item and use the Text editor instructions above.
 Text editor: Click the source code button and edit the code.
- Remove any height and width code
- Insert the style code following this format:
<img src="https://the_url" style="width: 100%; height: auto; max-width: 123px;" />
The ‘max-width’ value should be the actual width of the image or the maximum width desired when viewed using a large monitor, whichever is smaller.