Google Calendar: Create Links to Schedule Events
One of the most popular articles shows how to make appointment scheduling forms. Form owners can add links for the appointments as events to Google Calendar, too.

The best method is to provide a link in the Success Page or Notification email to add the event to Google Calendar.
This is good for organizations to track appointments without needing to view each result, and also is a good solution for letting form users or managers add the event to their own calendars.
Adding Google Calendar Events
The event information sends through the URL to the service, which collects the information and creates the event. The format for the link:
https://www.google.com/calendar/render?action=TEMPLATE&text=Title&dates=20190227/20190228
Required link items:
- action=TEMPLATE
- text=[the title of the event]
- dates=[dates with times optional]
Optional link items:
- ctz=[time zone]
- details=[event details]
- location=[event location]
Formatting the dates
The ‘dates’ parameter uses the format ‘YYYYMMDD’ and specific times add to each date by adding ‘T’ followed by the times in 24-hour format ‘HHMMSS’. For example:
- Feb 27, 2019 10:45 AM = 20190227T104500
- Oct 4, 2020 9:12 PM = 20201004T211200
For a one-day event, add the date of the event as the first date and the following day as the end date. Note that the month and day needs to be a 2-digit number.
The times use the user’s time zone by default. If the users will be from other time zones, the optional ‘ctz’ parameter add the time in one zone and the user’s calendar converts it. See a list of time zones at https://en.wikipedia.org/wiki/List_of_tz_database_time_zones.
Creating the Link on the Success Page
When the form is complete, create the Success Page using the Standard or Custom format. Use the formatting instructions above to add the link destination. For events with a single title, description, location, and time, insert those values into the proper places in the link.
<a href="https://www.google.com/calendar/render?action=TEMPLATE&text=Event&dates=20190227/20190228">Add to your Google Calendar</a>
For appointment scheduling forms or events with choices, use pipe codes in the link. In this example, the form schedules an appointment where the visitor chooses the date and time.
The known values:
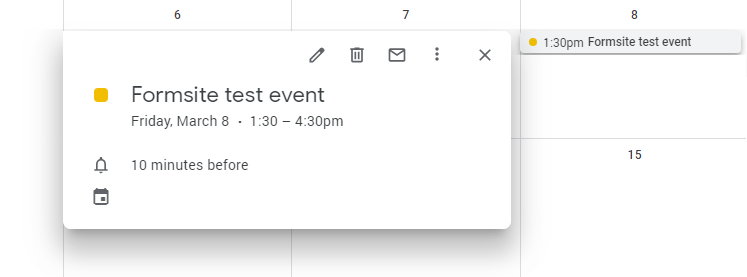
- text=Formsite test event
The custom values:
- date=[pipe:0] (item 0 is the Calendar item)
- time=[pipe:1]:[pipe:i2] (items 1 and 2 are Dropdowns with hours and minutes)
- duration=[pipe:3] (item 3 is the duration)
Creating the custom link on the Success Page:
- Create the Success Page using the Custom format
- Uncheck the box next to Enable text editor to see and edit the HTML code
- Add this script, changing the pipe codes to the actual pipe codes for your date and time items:
<div style="margin:auto;width:500px;font-family:Arial, sans-serif;font-size:18px;line-height:200px;border:3px solid #ccc;border-radius:4px;text-align:center;">Success!
<script>

   // Set these variables with text or the pipe code from the form

 var event_name = "Formsite test event";
 var day = "[pipe:0]"; // replace with your Calendar item pipe code - note the quotes are important
 var hour = [pipe:1]; // replace with your hour item pipe code - expects a number so no quotes
 var min = [pipe:2]; // replace with your minute item pipe code - expects a number so no quotes
 var duration = [pipe:3]; // can replace with any number or decimal (1.75 for example)
 var link_text = "Add to Google Calendar";

   // the earliest daily appointment is 8am, so we add 12 to numbers less than that to get 24 hours.
 hour = hour < 8 ? hour+12 : ("0" + hour).slice(-2);
 min = ("0" + min).slice(-2); // makes sure it is a 2-digit number

  // ----------- Nothing should be changed below here ------------
 var date = new Date(day + "T" + hour + ":" + min);
 var date_end = new Date(date);
 date_end.setHours(date.getHours()+duration);
 date = date.toISOString().replace(/-|:|\.\d\d\d/g, "");
 date_end = date_end.toISOString().replace(/-|:|\.\d\d\d/g, "");
 var link = "https://calendar.google.com/calendar/render?action=TEMPLATE&text=" + event_name + "&dates="+ date + "/" + date_end;
 document.write('<a href="'+link+'" target="_blank">'+link_text+'</a>');
  </script>
</div>
Test by completing the form and clicking the link to verify the link works as it should.
If you need a form template, try our scheduling form online template.