Excel Tips for Working With Your Formsite Results
Your form results can be viewed in several ways, from individual results in Notifications to exporting as a complete spreadsheet. Exported spreadsheets can be opened by a few applications and the most common is Excel for both Mac and Windows operating systems. Google Sheets is a free alternative and is accessed through your browser, and most of these tips can be used interchangeably with both.
If you’re brand-new to Excel, a good place to learn the basics is at Microsoft’s help and training pages at https://support.office.com/en-us/excel.
Working with your results in Excel can be an integral part of your data collection process, and here are some ways to make the most out of your results spreadsheets.
Cell Formatting
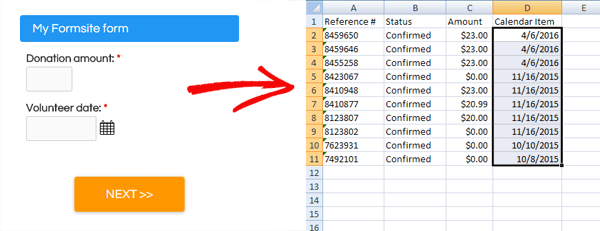
Values coming from your Formsite database will not retain any formatting rules, so if you have any specially-formatted cells then you’ll need to know how to apply your format in Excel. Currency and scoring columns, for example, will need to be formatted as numbers before being able to perform any equations on the values.
To format your number columns:
- Open your file in Excel
- Click in the first cell and drag to select all of the cells in the column
- Right-click or press Ctrl+1 to open the Format Cells dialog box
- Select the cell format and click OK
To format your date columns:
- Open your file in Excel
- Click in the first cell and drag to select all of the cells in the column
- Right-click or press Ctrl+1 to open the Format Cells dialog box
- Select the cell format and click OK
If your cells don’t automatically update, do this to apply the format to the existing values:
- Select the affected cells
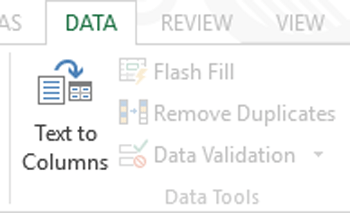
- Click the Data tab and click Text to Columns
- Click the Finish button
Printing from Excel
Because your spreadsheet can be many columns wide and many rows long, printing presents some unique obstacles. In order to successfully print, you first need to select your print area then set your print options.
 Click and drag to select your cells to print
- On the Page Layout tab, click the Print Area button and choose Set Print Area
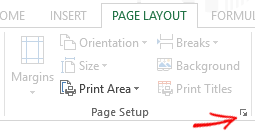
- Click the dialog box launcher icon in the Page Setup box to view the Page Setup
- Select your page orientation (portrait or landscape)
- Select your Scaling preference:
- Click Print Preview to see how it looks, then Print
Excel Functions
One of the features that makes Excel so useful is its ability to use functions to perform calculations using your data. For example, to quickly get the total collected from the form:
- Select the cell underneath the last value in the column
- Click into the Formula Bar and click the Insert Function button
- Select the SUM function then click and drag around the values you want to sum
- Click OK
Once you get familiar with the commonly-used functions you can simply type them into the Formula Bar, too.
Generate Pre-populate Links
Use Excel to generate links that you can send to previous form visitors with their information pre-populated. For example, if you want your email recipients to click the link and have their email address already filled, you would start with your email list:
Next, add a column where you’ll put your formula to create your pre-populate link. The format for compiling the link is:
="your text goes here"&A1&"more text"
So using the example spreadsheet above with the Pre-populate link found on the form’s Share page:
="https://fsx.formsite.com/directory/form/fill?1="&B3&"&2="&B4
You can then click and drag the fill handle to duplicate the formula for every row. Now you can copy and paste the link into your email client, or you can use the file as a data source for your mass email service or Word documents.